
Set up Auto run on publish with Webflow
Connect your Webflow site and choose which scans should run when you publish. Once set up, Sitepager starts those scans automatically after you publish.
Before you start
Section titled “Before you start”Have these ready:
- The scans you want to run, already created in Sitepager. You pick from your existing scans during setup, so create them first if you have not. See Setting Up Your Scans.
- Access to your Webflow site settings, so you can create a Site API token.
- A Webflow custom domain that matches a website in Sitepager, if you want production scans to run. Staging works without one.
- A plan that includes Auto run on publish. If yours does not, you will see an option to upgrade your plan.
See how it works
Section titled “See how it works”A short interactive walkthrough, from creating the token to reviewing your first automatic run.
Connect your Webflow site
Section titled “Connect your Webflow site”First, create the token in Webflow:
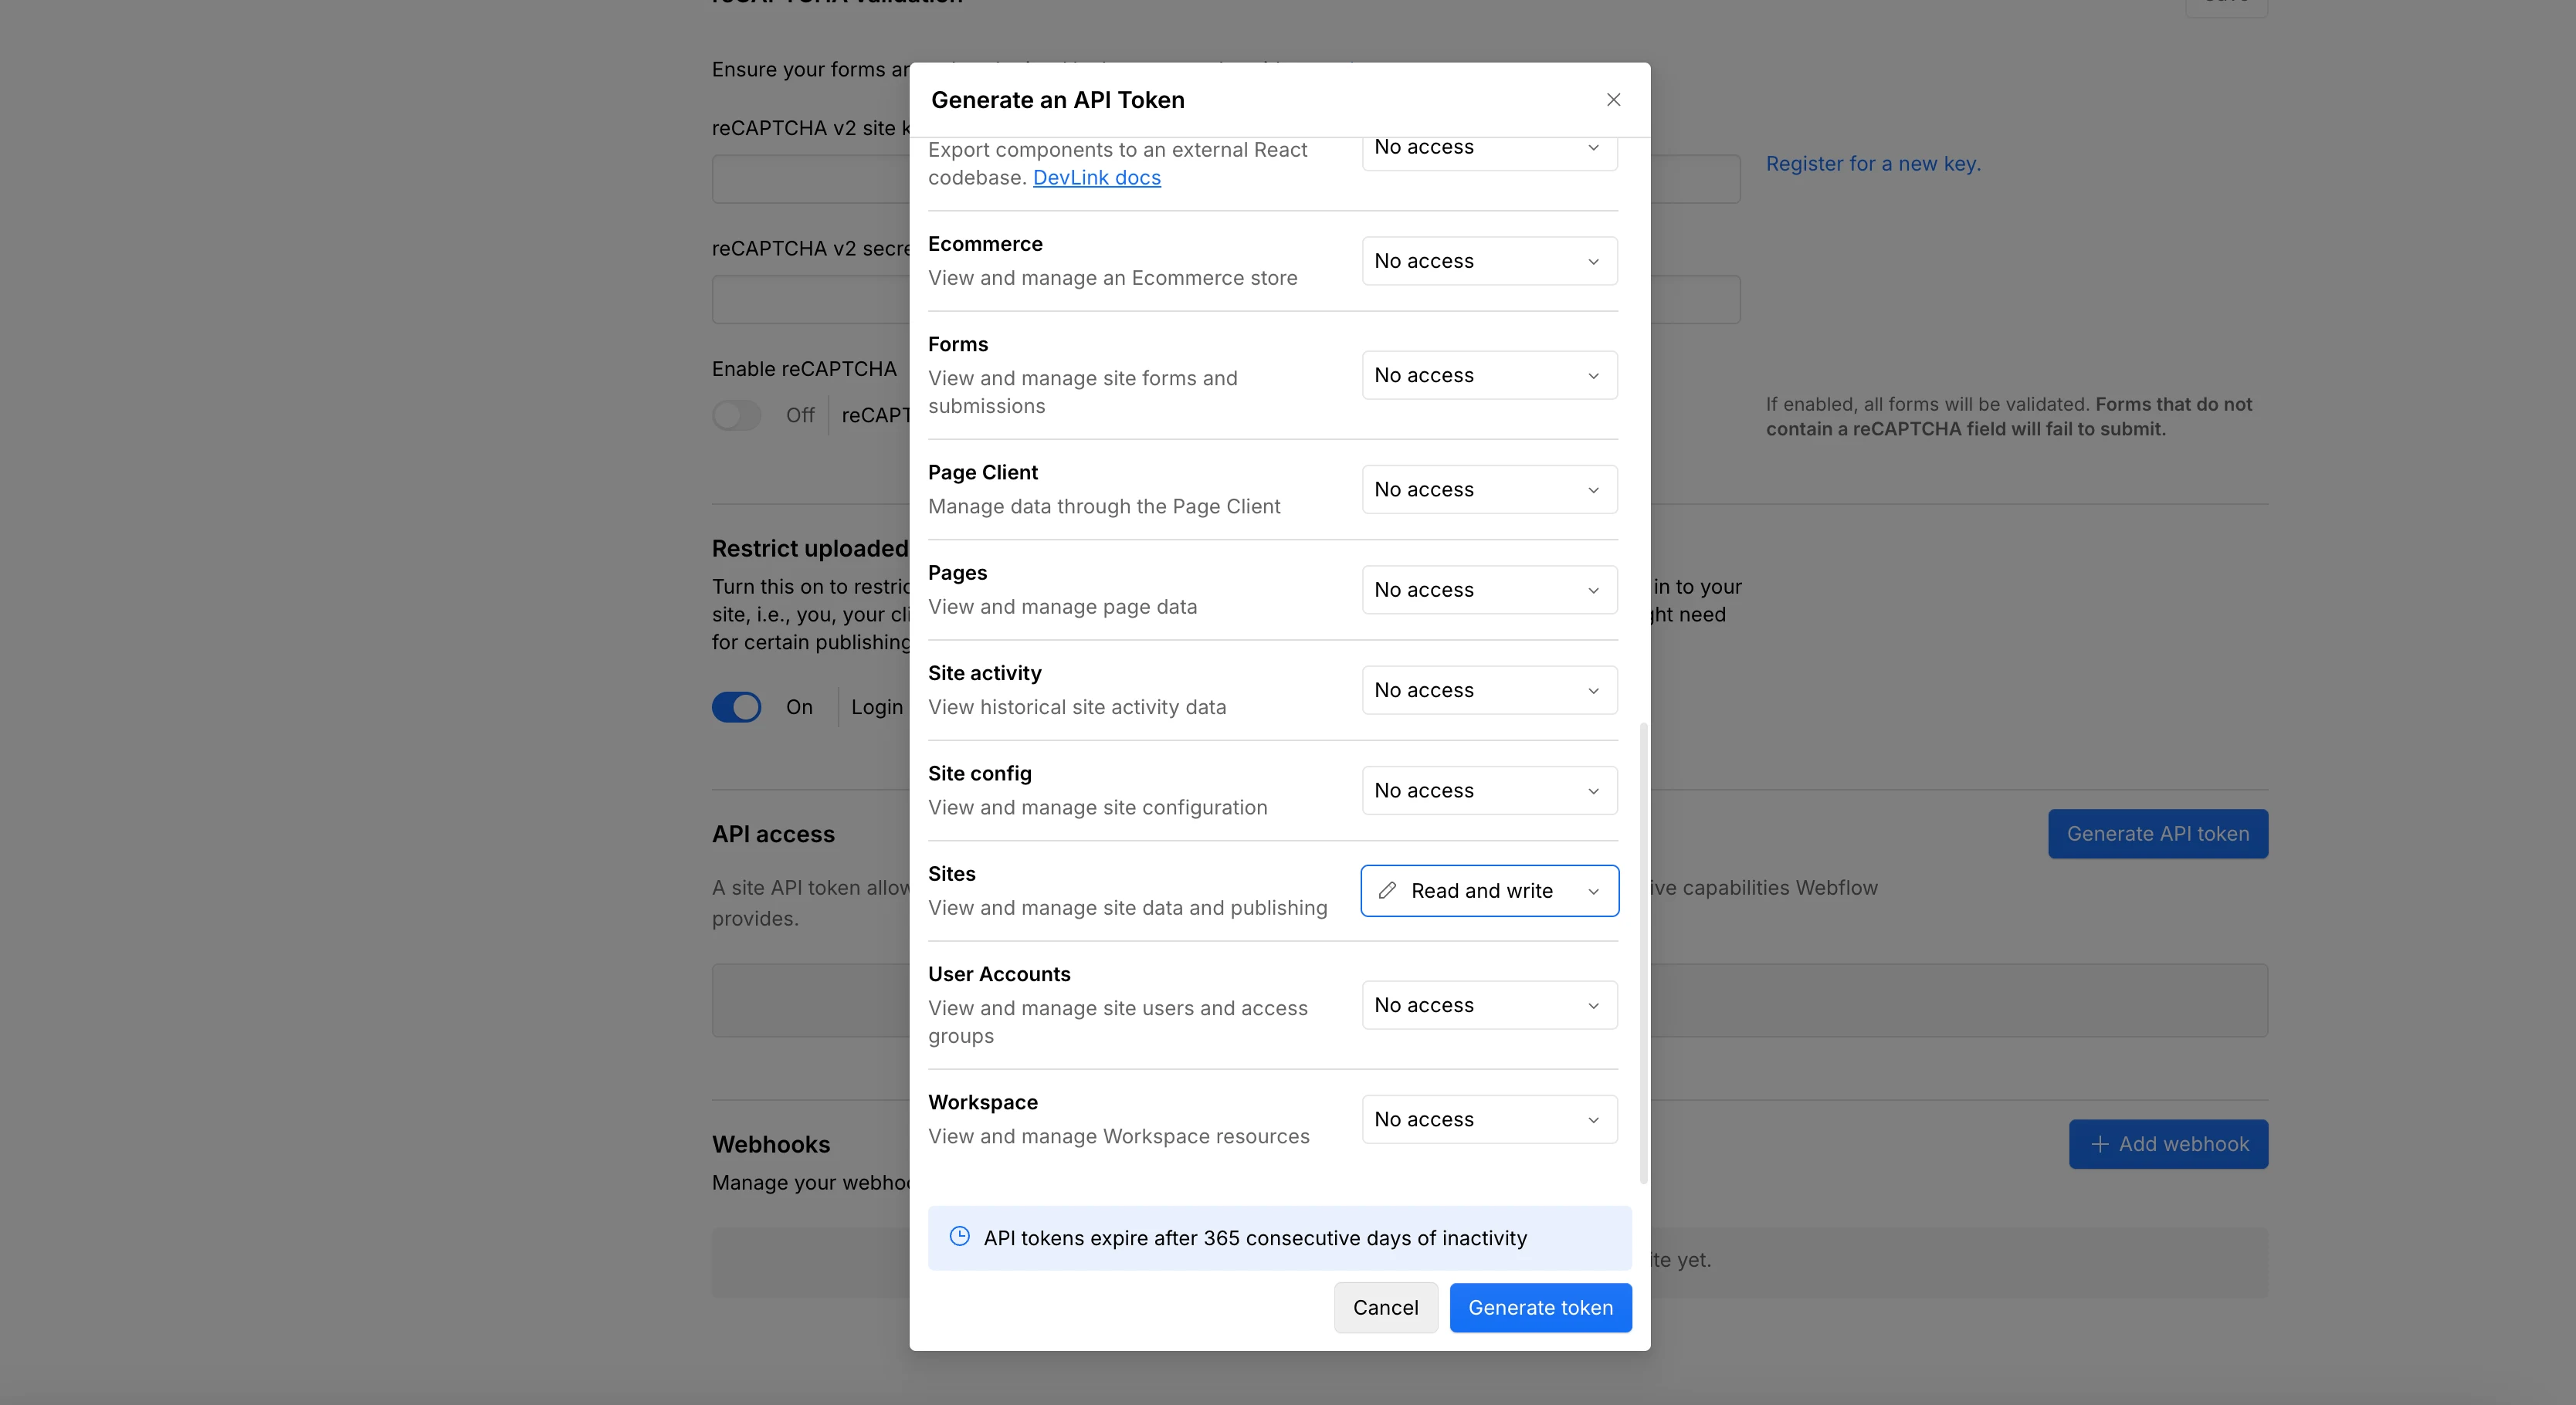
- In Webflow, open Site settings → Apps & integrations → API access
- Click Generate API token
- Name the token, for example Sitepager, then set Sites to Read and write. Write access lets Sitepager register for publish notifications.
- Leave every other permission as No access
- Click Generate token
- Webflow shows the token once, under Save your API token. Copy it before you click Hide token forever, because it cannot be accessed again.
Then connect it in Sitepager:
- Go to Settings → Integrations
- Under Connected sites, click Connect a site
- Choose Webflow
- Paste your token and click Continue
Sitepager checks the token and shows you which site it connects before anything is saved.
Your Site API token decides which Webflow site is connected. To connect a different site, create a token from that site.
Choose which scans run
Section titled “Choose which scans run”Next, pick the scans for each environment. Staging and production are configured independently. You can set up one and leave the other alone.
Sitepager matches each environment to a website you already have:
- Staging matches your Webflow staging domain.
- Production needs a Webflow custom domain that matches a website already in Sitepager.
Select the scans you want Sitepager to run automatically for each environment, then finish the setup.
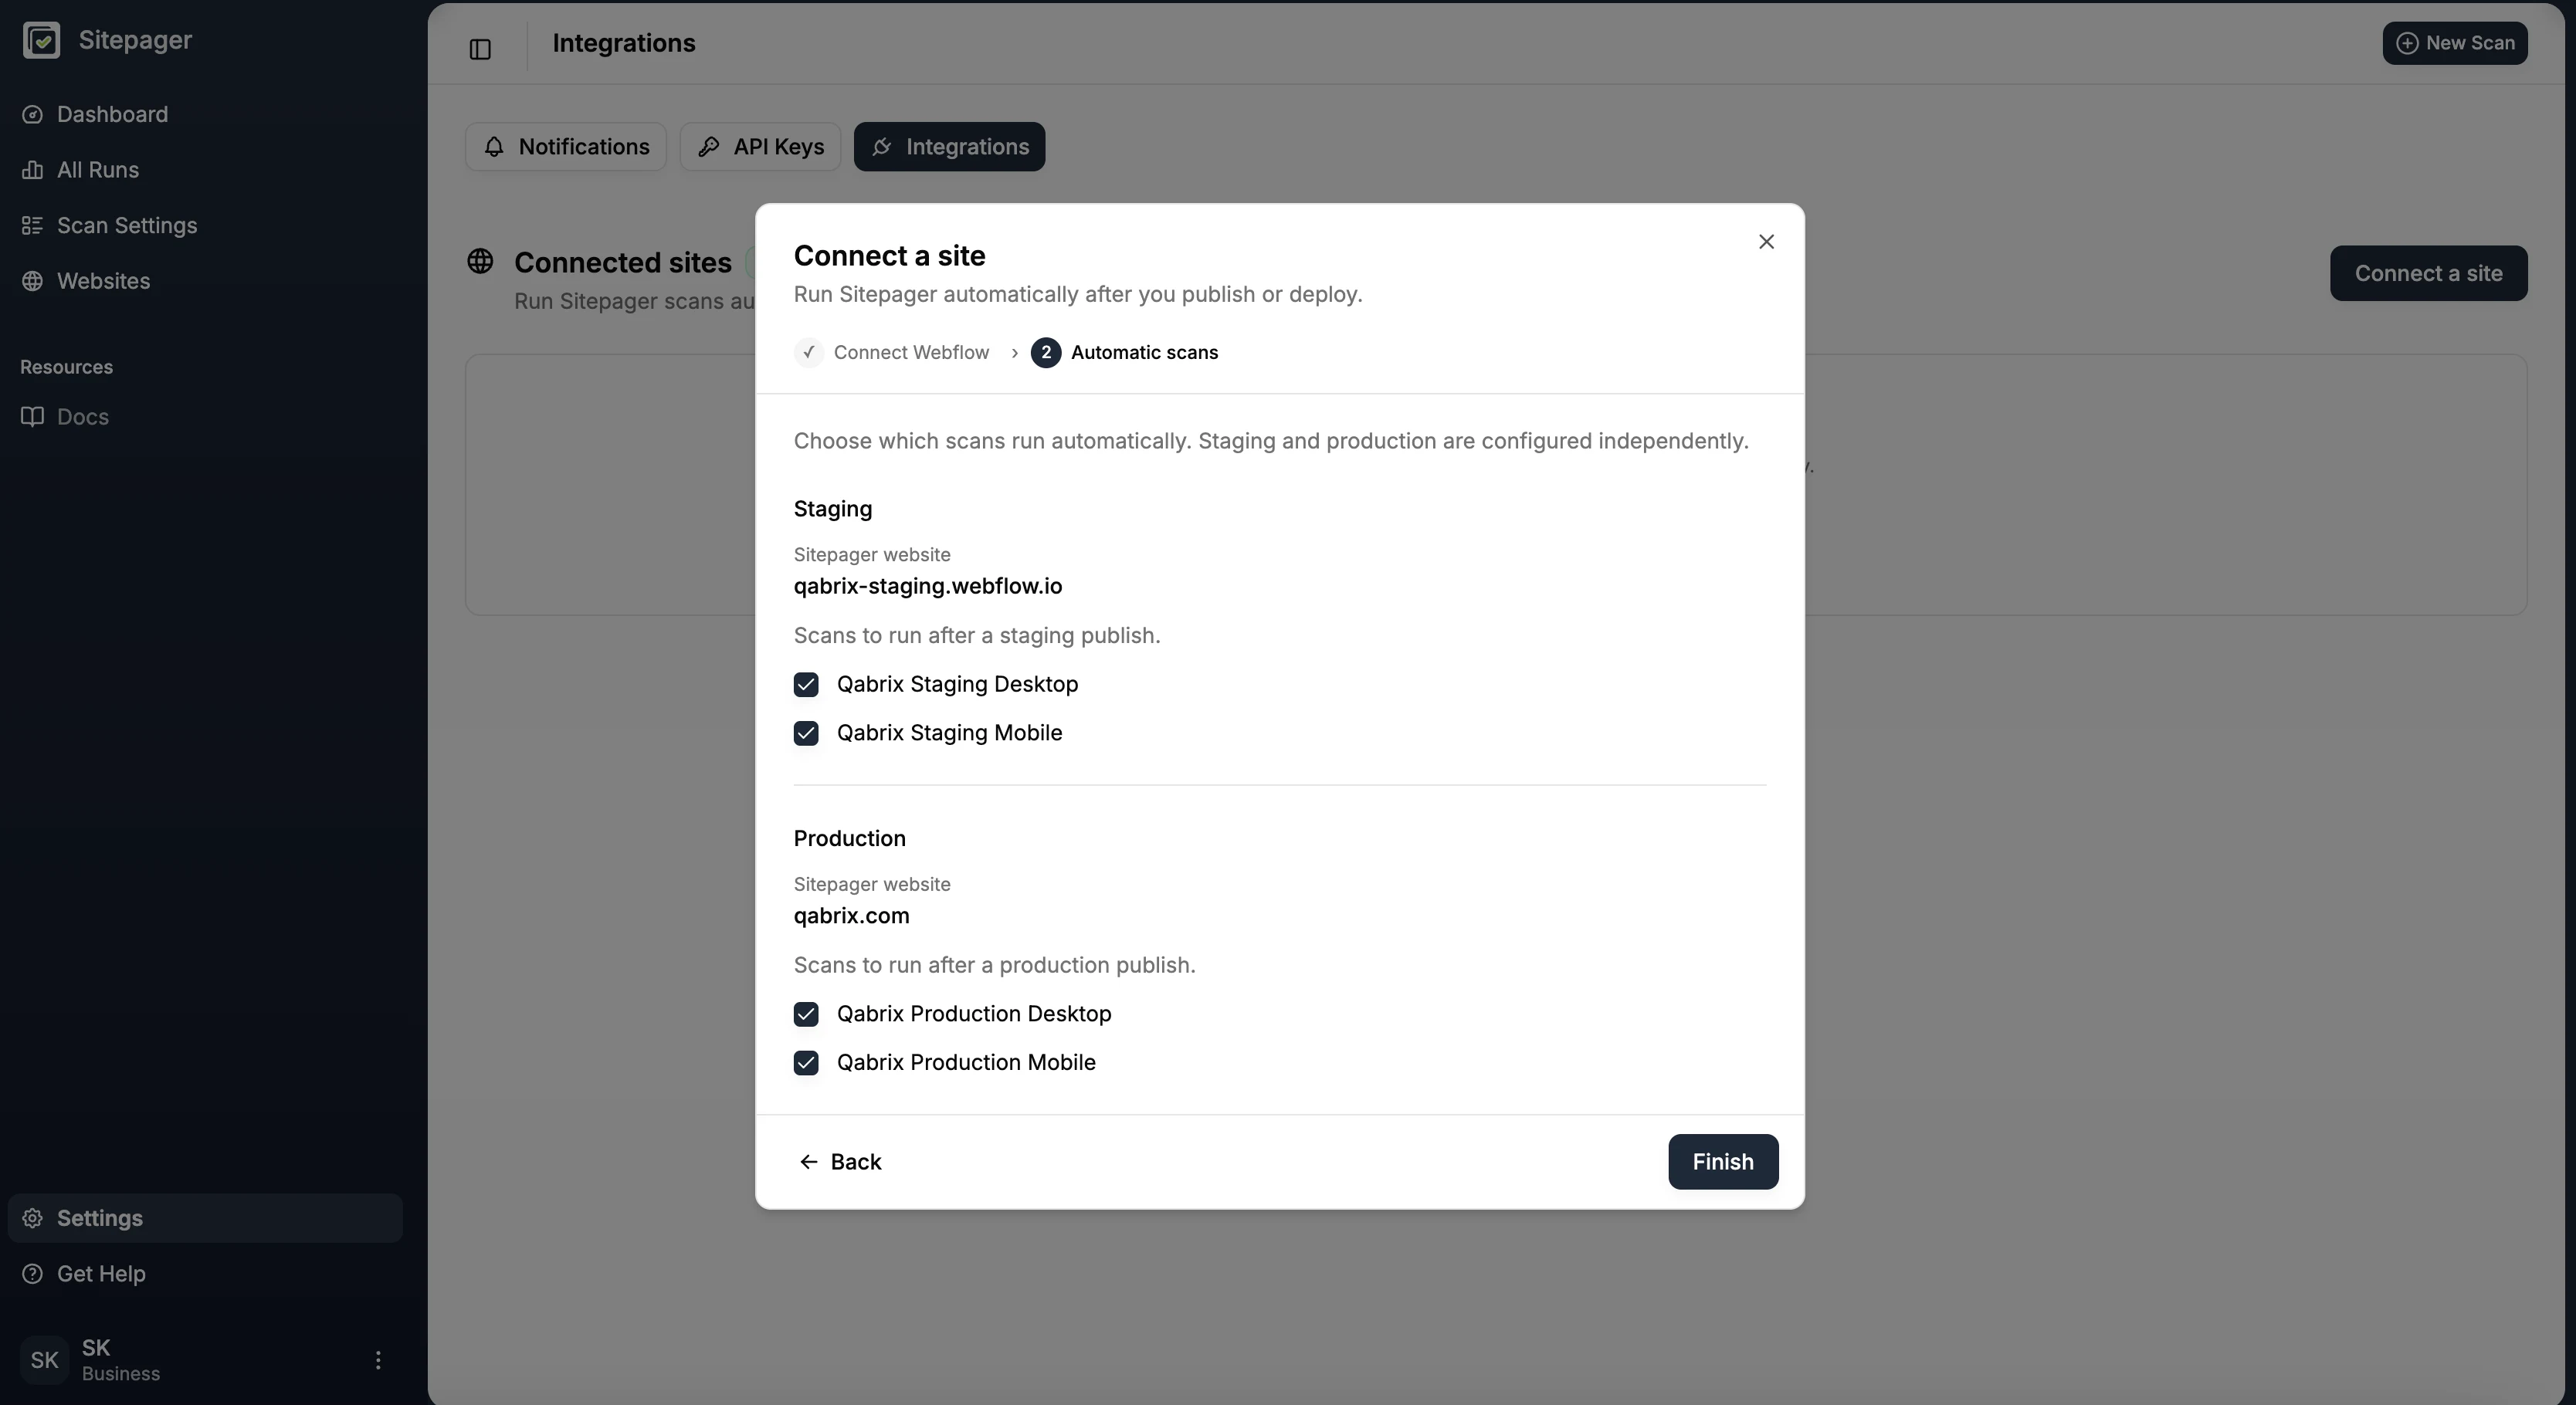
An environment reads Not set up when nothing will run for it, either because no scans are selected or because Sitepager has no matching website for that environment yet.
To change your selection later, open Settings → Integrations and click Manage scans on the site. To stop automatic runs altogether, open the … menu on the site and choose Disconnect. Your scans and past results are not affected, and you can reconnect later.
When runs start
Section titled “When runs start”Runs do not start the instant you publish. Sitepager waits about five minutes first, so if you spot something and publish again, both publishes are covered by one run rather than starting a run each. The run starts about five to ten minutes after your last publish.
What you see after publishing
Section titled “What you see after publishing”Publish your site the way you always do. Shortly afterwards, All Runs shows that Sitepager received the publish, along with the site, the environment, and the scans that are queued.
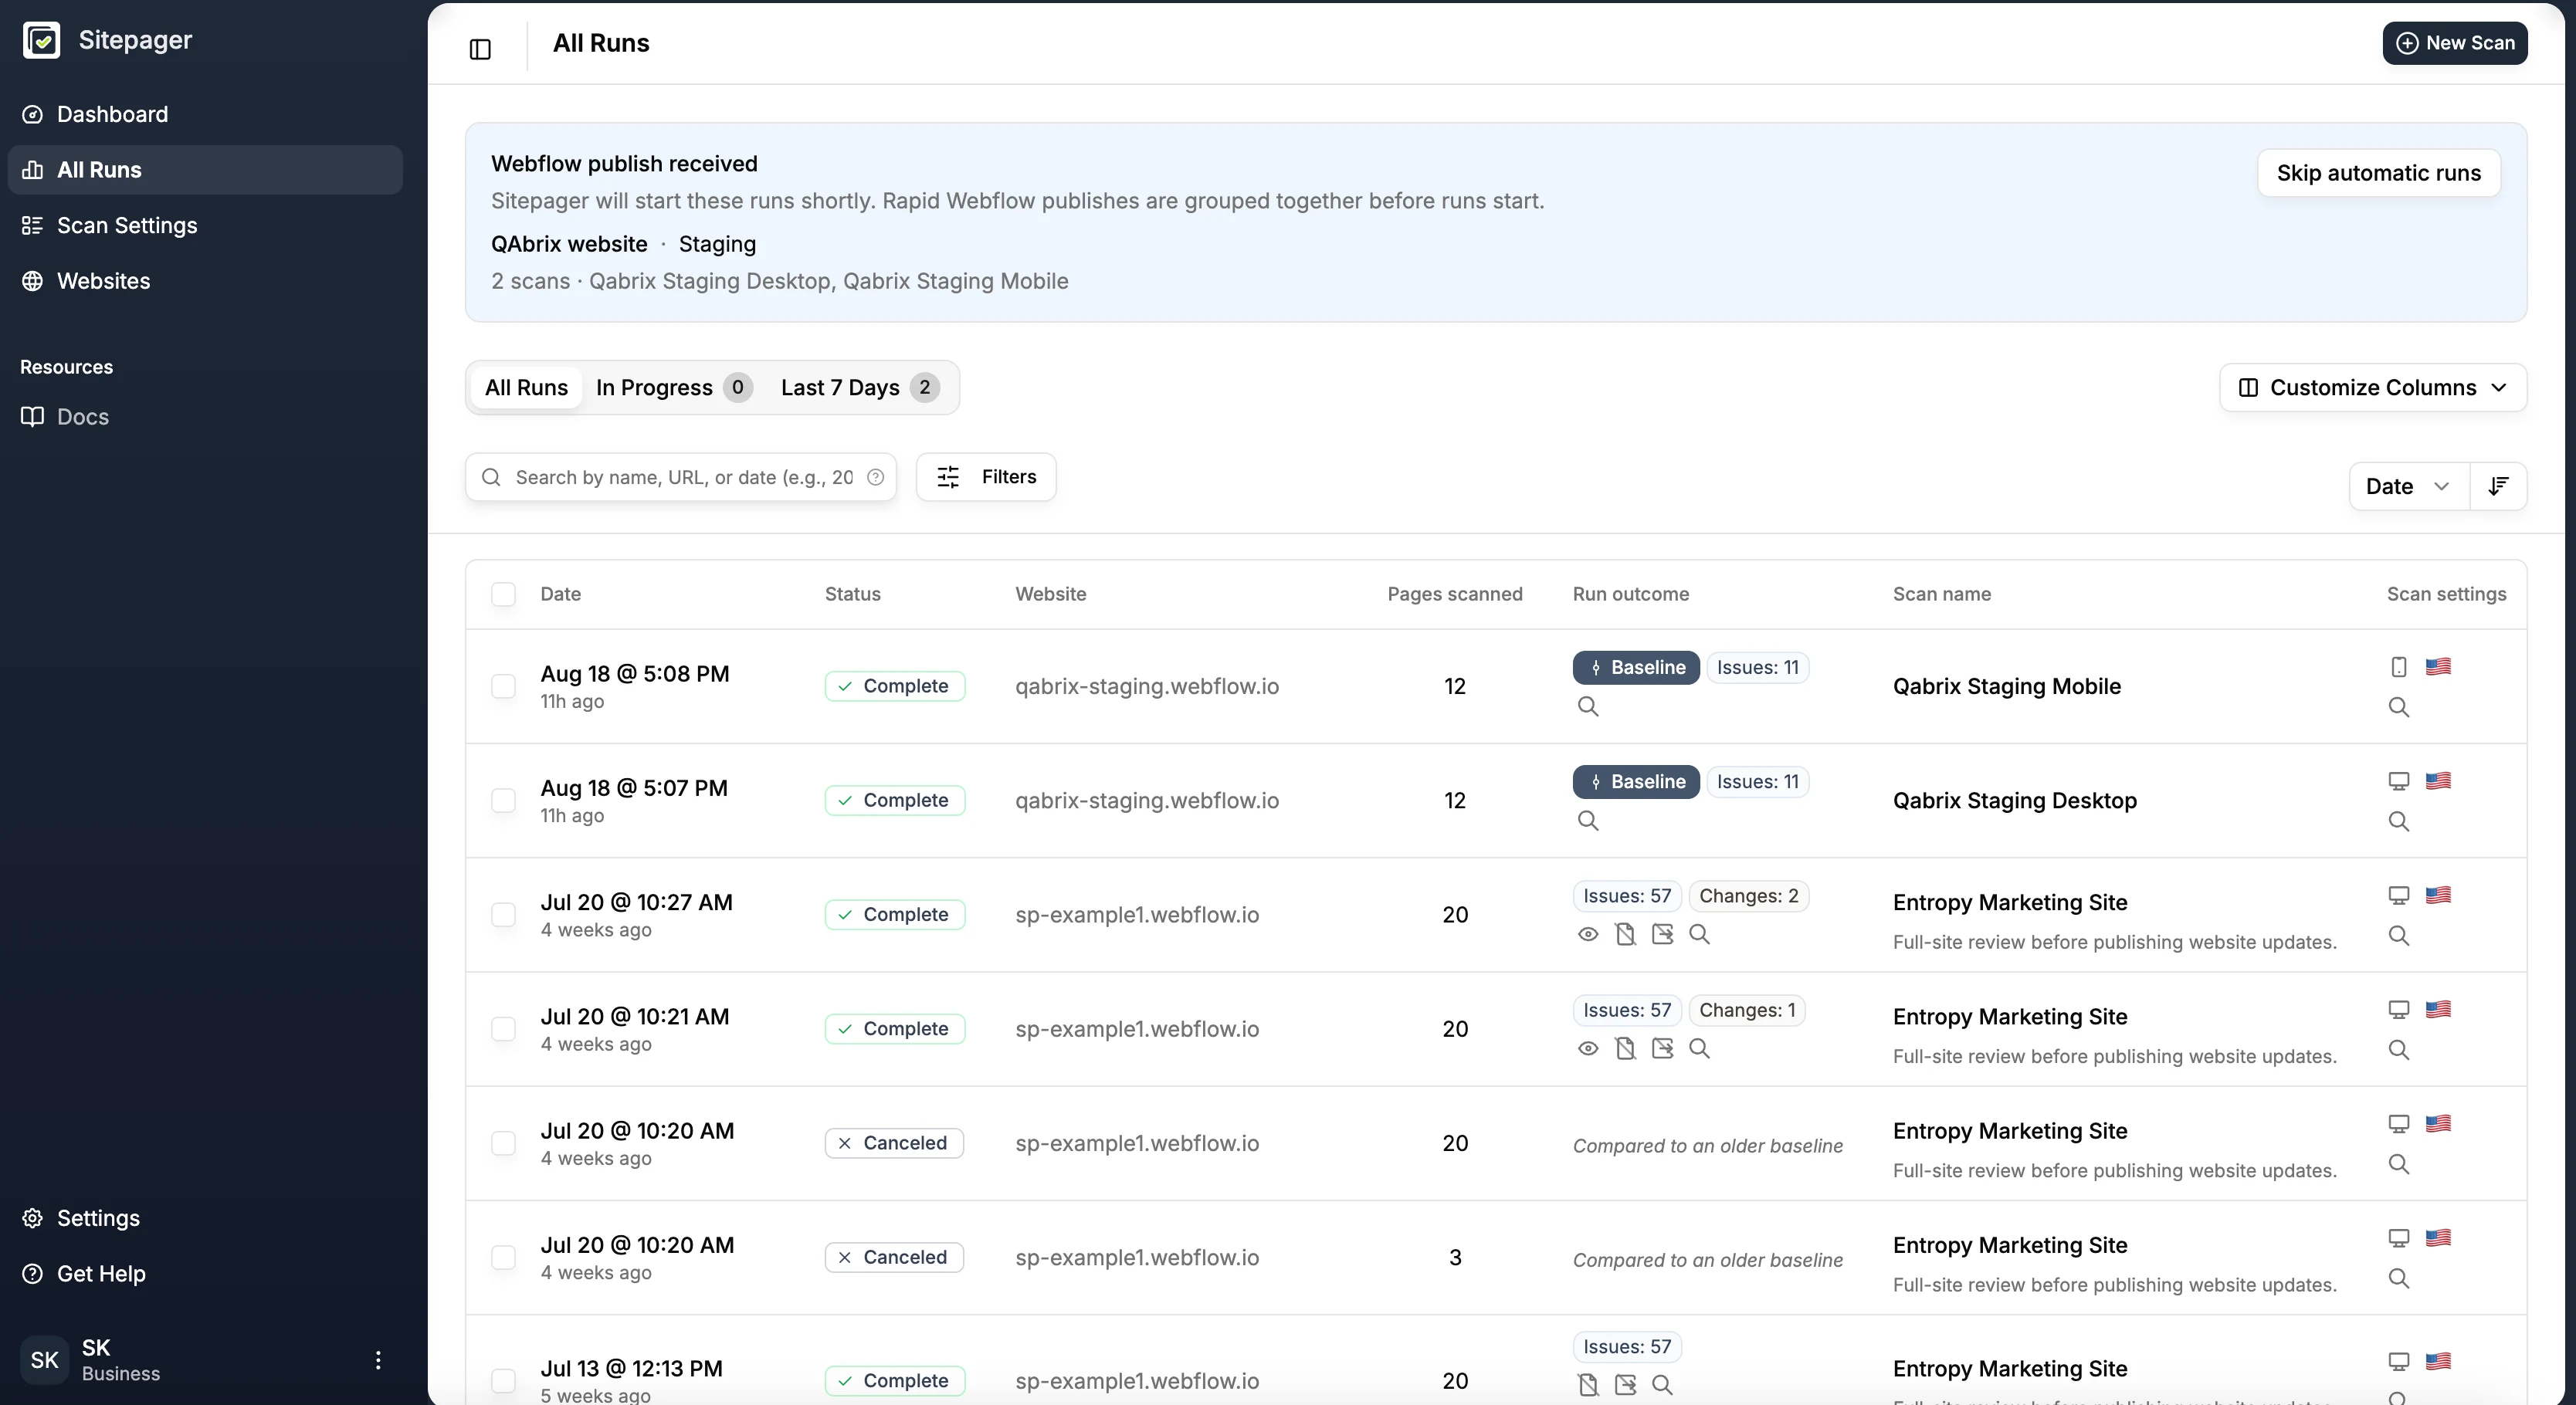
If you do not want this publish checked, click Skip automatic runs while it is still waiting.
Once the wait is over, the runs start on their own and appear in All Runs like any other run.
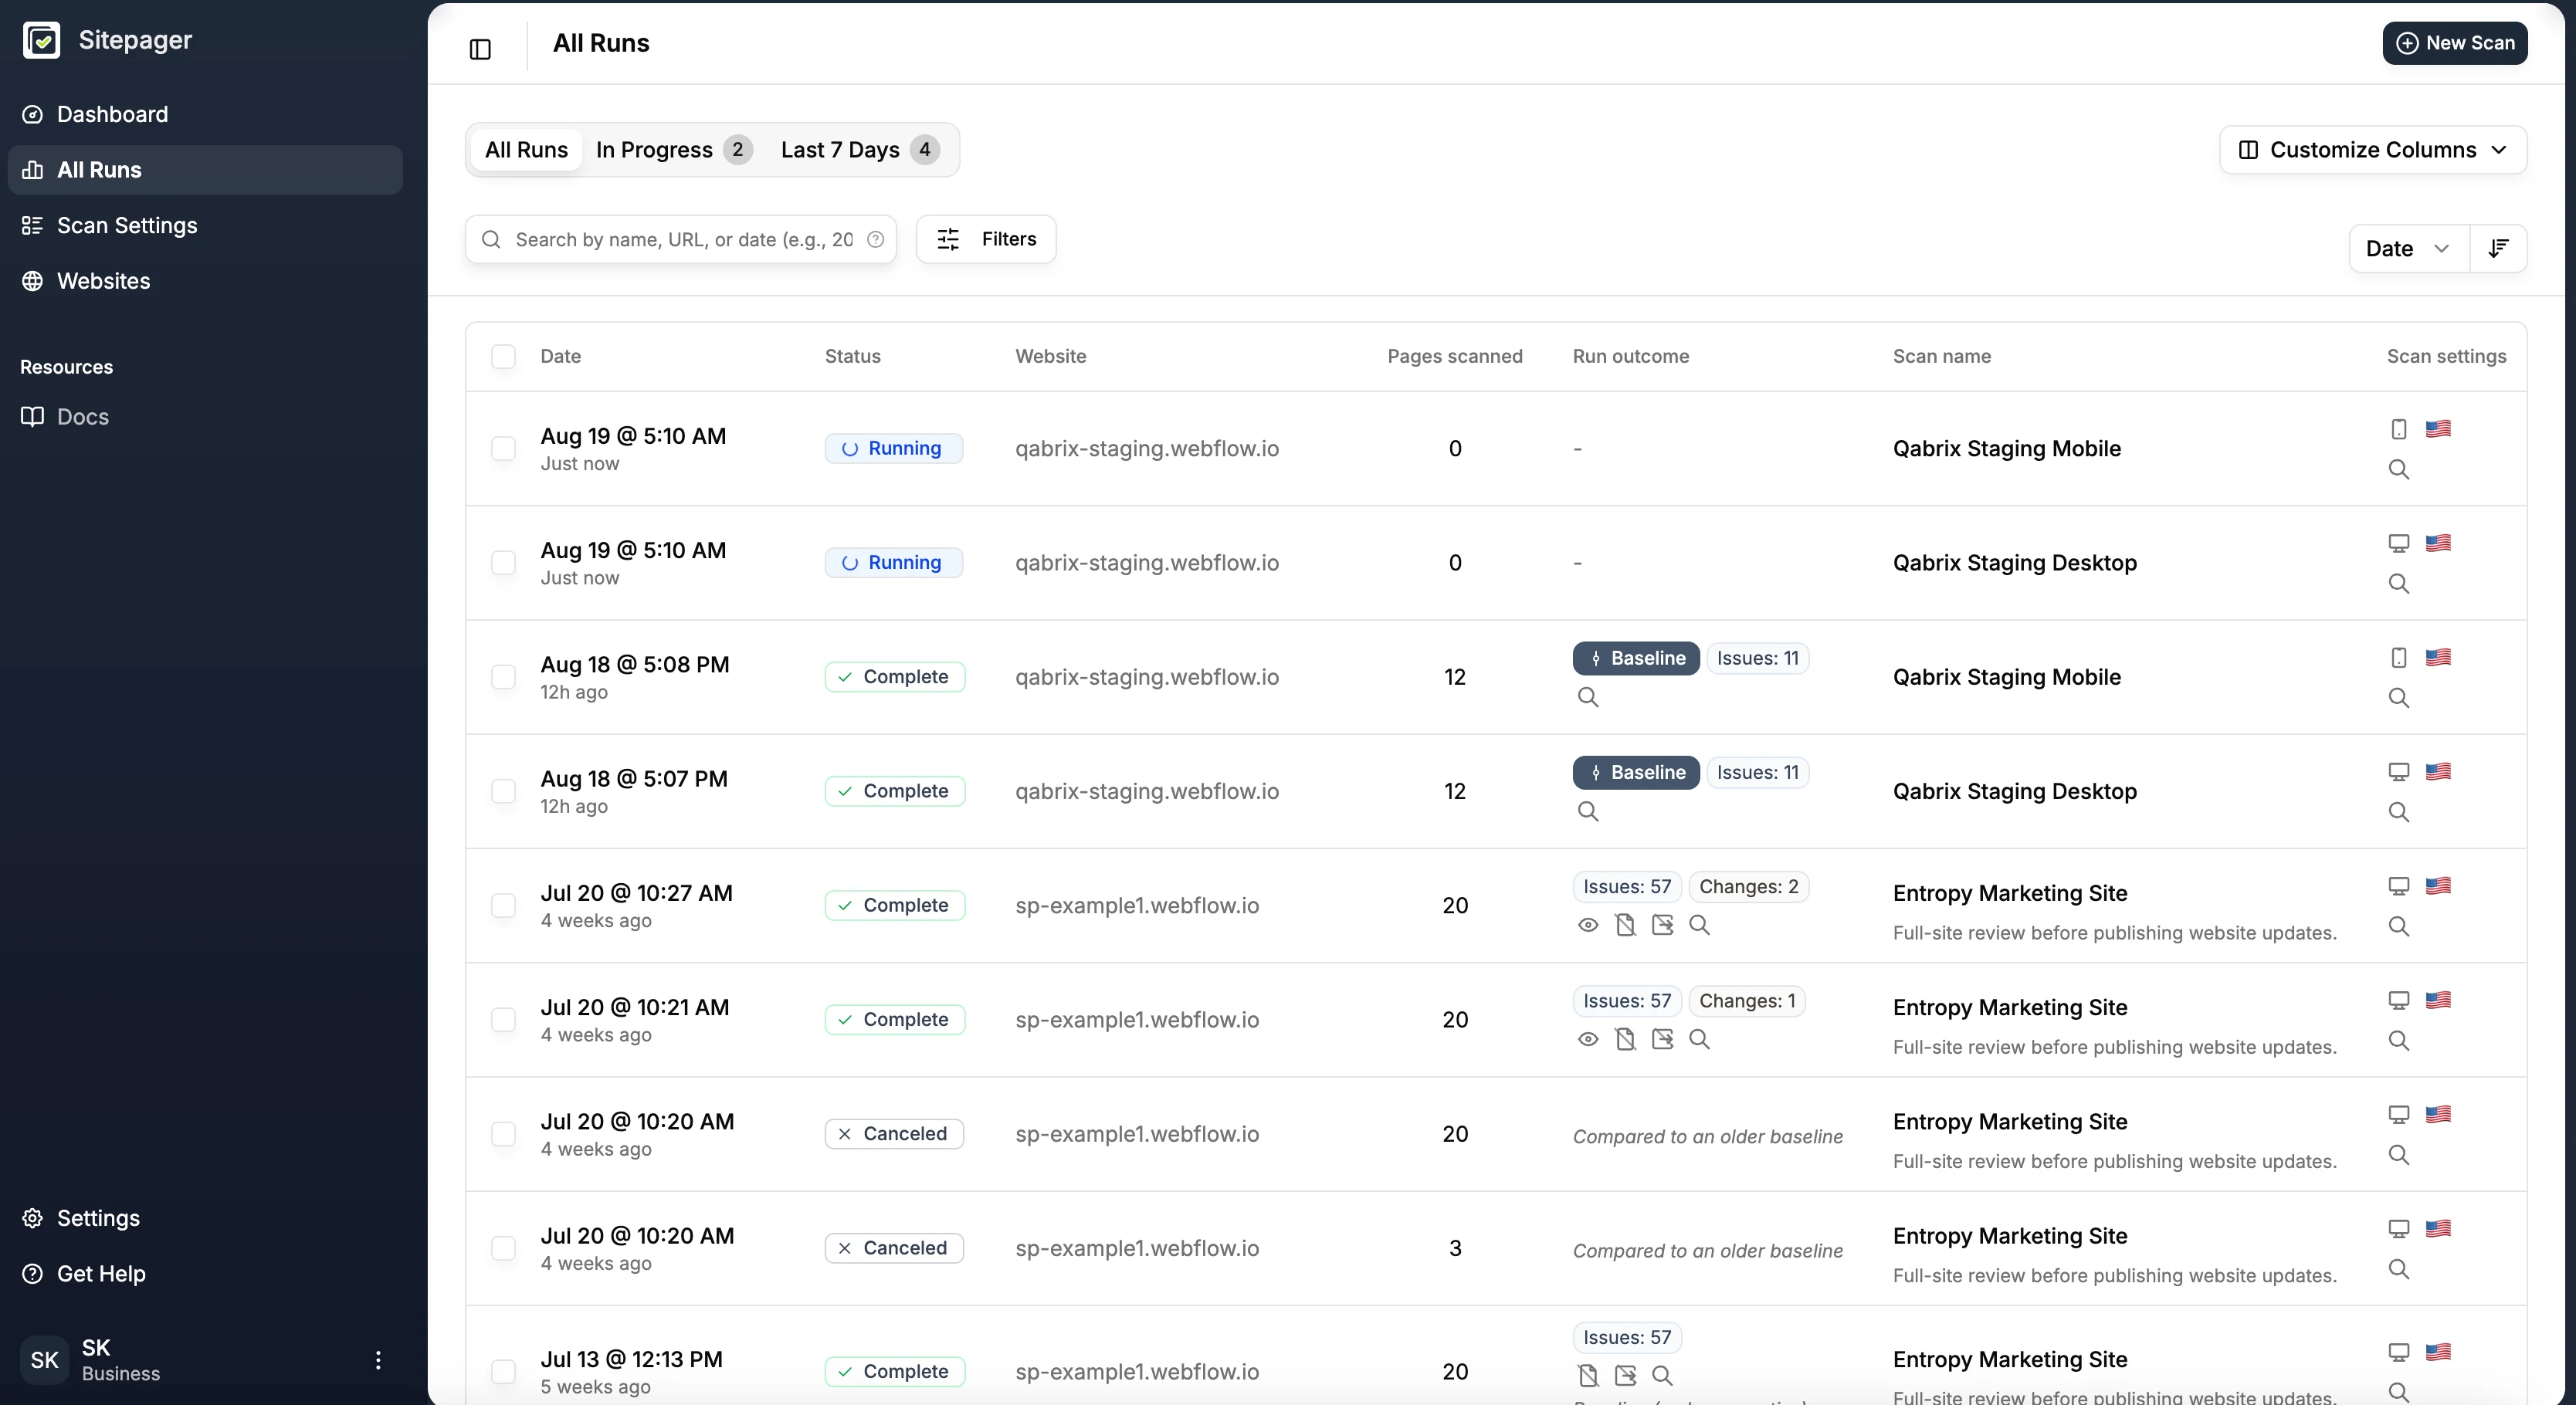
If this is the first time a scan has run, it creates the baseline and reports no changes. That is expected. Every run after it compares against that baseline, so the next run starts showing you what changed. See Understanding Baselines.
Sitepager can email you when a run completes or fails. See Email Notifications.
Checking the connection itself
Section titled “Checking the connection itself”The first time you set this up, you can confirm the connection in Settings → Integrations. It reads Waiting for first publish until Sitepager receives one, then Active with the time of the last publish.
If a run does not appear
Section titled “If a run does not appear”Work through these in order:
- Was the site actually published? A saved change in the Designer is not a publish.
- Was it published to staging or production? Each environment runs only the scans selected for it.
- Does that environment have scans selected? If it reads Not set up, nothing will run.
- For production, is the correct custom domain connected? Production needs your Webflow site’s custom domains to point to one Sitepager website. If they point to more than one Sitepager website, production stays Not set up until they point to a single website.
- Does the site still read Waiting for first publish? Then Sitepager has not recorded a publish for this connection yet. Start by publishing the site once and checking again.
If Sitepager starts the run but cannot access your site, website security may be blocking it. See Allow Sitepager Through Your Firewall.
Still stuck? See Troubleshooting.
How it fits into the release process
Section titled “How it fits into the release process”Auto run on publish removes one step from the loop: remembering to run your scans. Everything after that stays the same.
You publish, Sitepager runs the scans you selected for that environment, and you review what changed. When the changes are the ones you intended, update the baseline so the next run compares against them.
For staging and production workflows, set up scans for each environment so you can catch changes on staging before they reach visitors. See Compare Environments for checking one environment against the other.