
Connect Sitepager to Your AI Assistant with MCP
Sitepager MCP connects your AI assistant directly to Sitepager.
It does not modify your website directly. It works alongside your existing tools as part of the scan → fix → verify workflow.
What you can do
Section titled “What you can do”Once connected, your assistant can:
- Create scans, run them, and wait for results
- Summarize issues across your entire site
- Identify broken pages and broken links
- Detect pages added or removed since the baseline
- Review visual changes against the baseline
- Investigate SEO issues on specific pages
- Retrieve Lighthouse reports from a scan and review performance issues
Requirements
Section titled “Requirements”- A Sitepager account
- An AI assistant that supports MCP (Claude Desktop or Claude Code recommended)
Get your API key
Section titled “Get your API key”- Log in to Sitepager
- Go to Settings > API Keys
- Create a new key and copy it
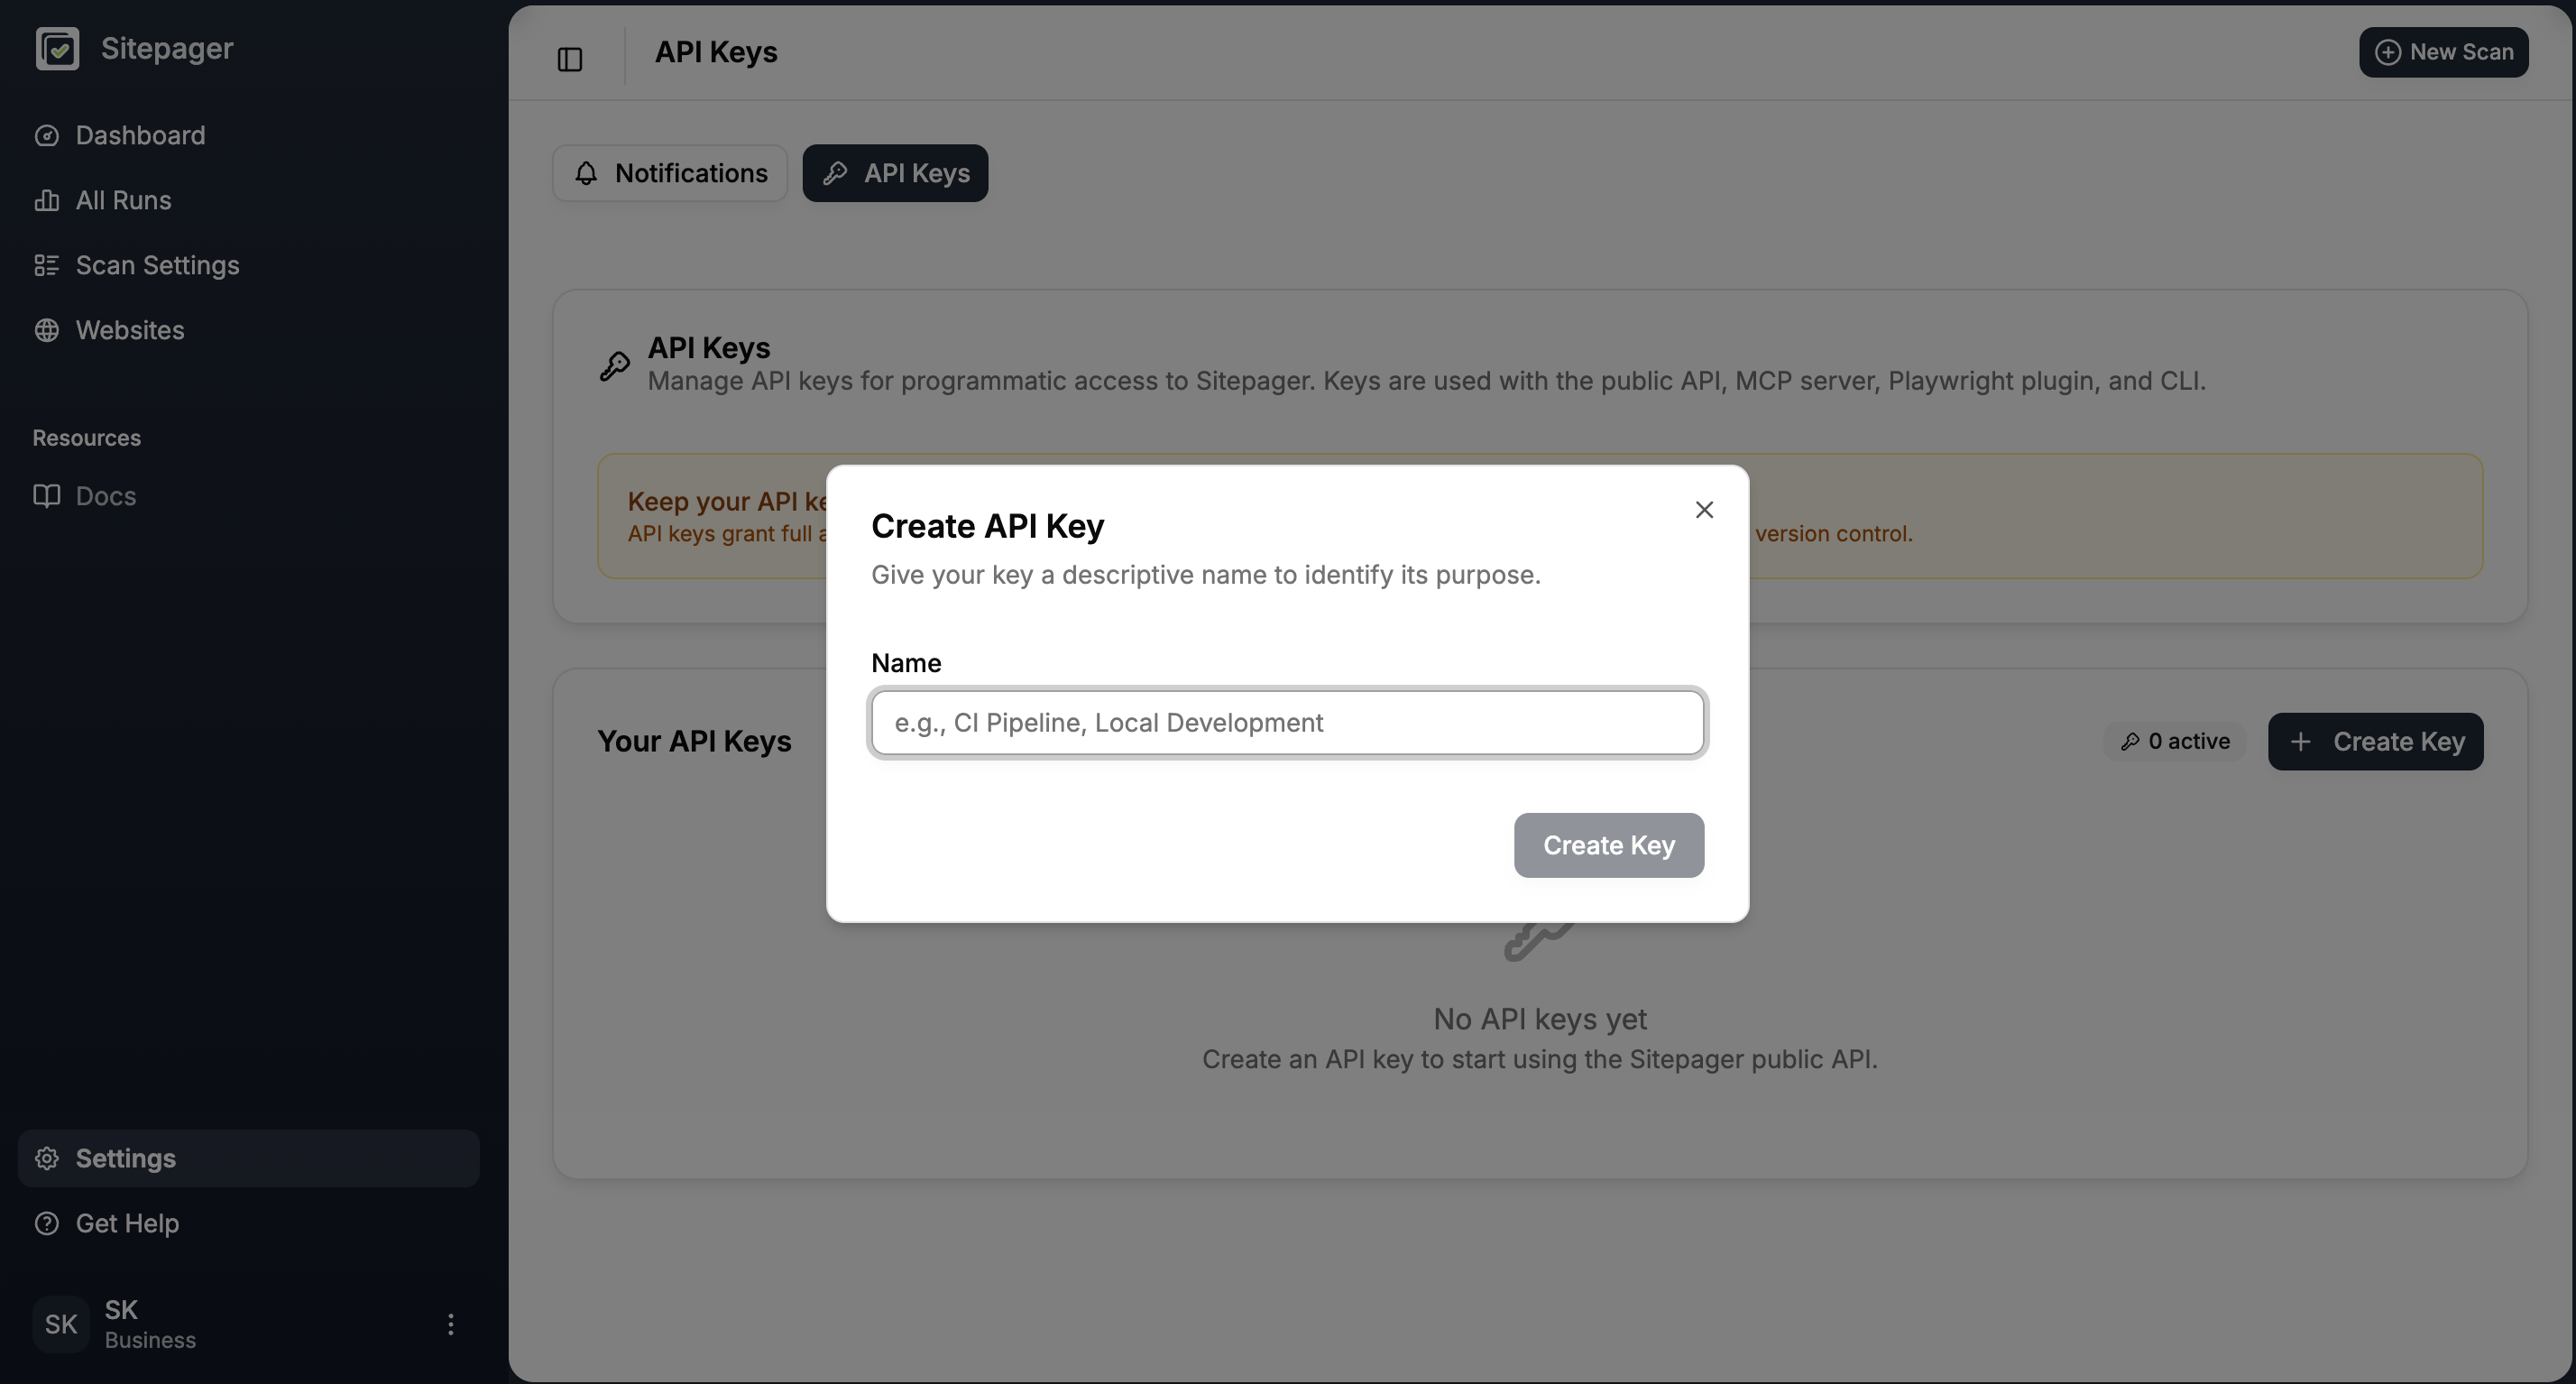
Your key starts with sp_live_. Keep it secure. It gives access to all scans and results in your workspace.
Connect Sitepager MCP
Section titled “Connect Sitepager MCP”Most users should connect through the hosted endpoint. It requires no install and works with Claude Desktop, Claude Code, Cursor, Windsurf, and other MCP-compatible tools.
Choose your assistant below and follow the steps.
Claude Desktop connects through its built-in Connectors settings.
- Go to Settings > Connectors
- Click Add custom connector
- Fill in the dialog:
- Name:
Sitepager - Remote MCP server URL:
https://api-open.sitepager.io/v1/mcp?key=YOUR_API_KEY
- Name:
- Click Add
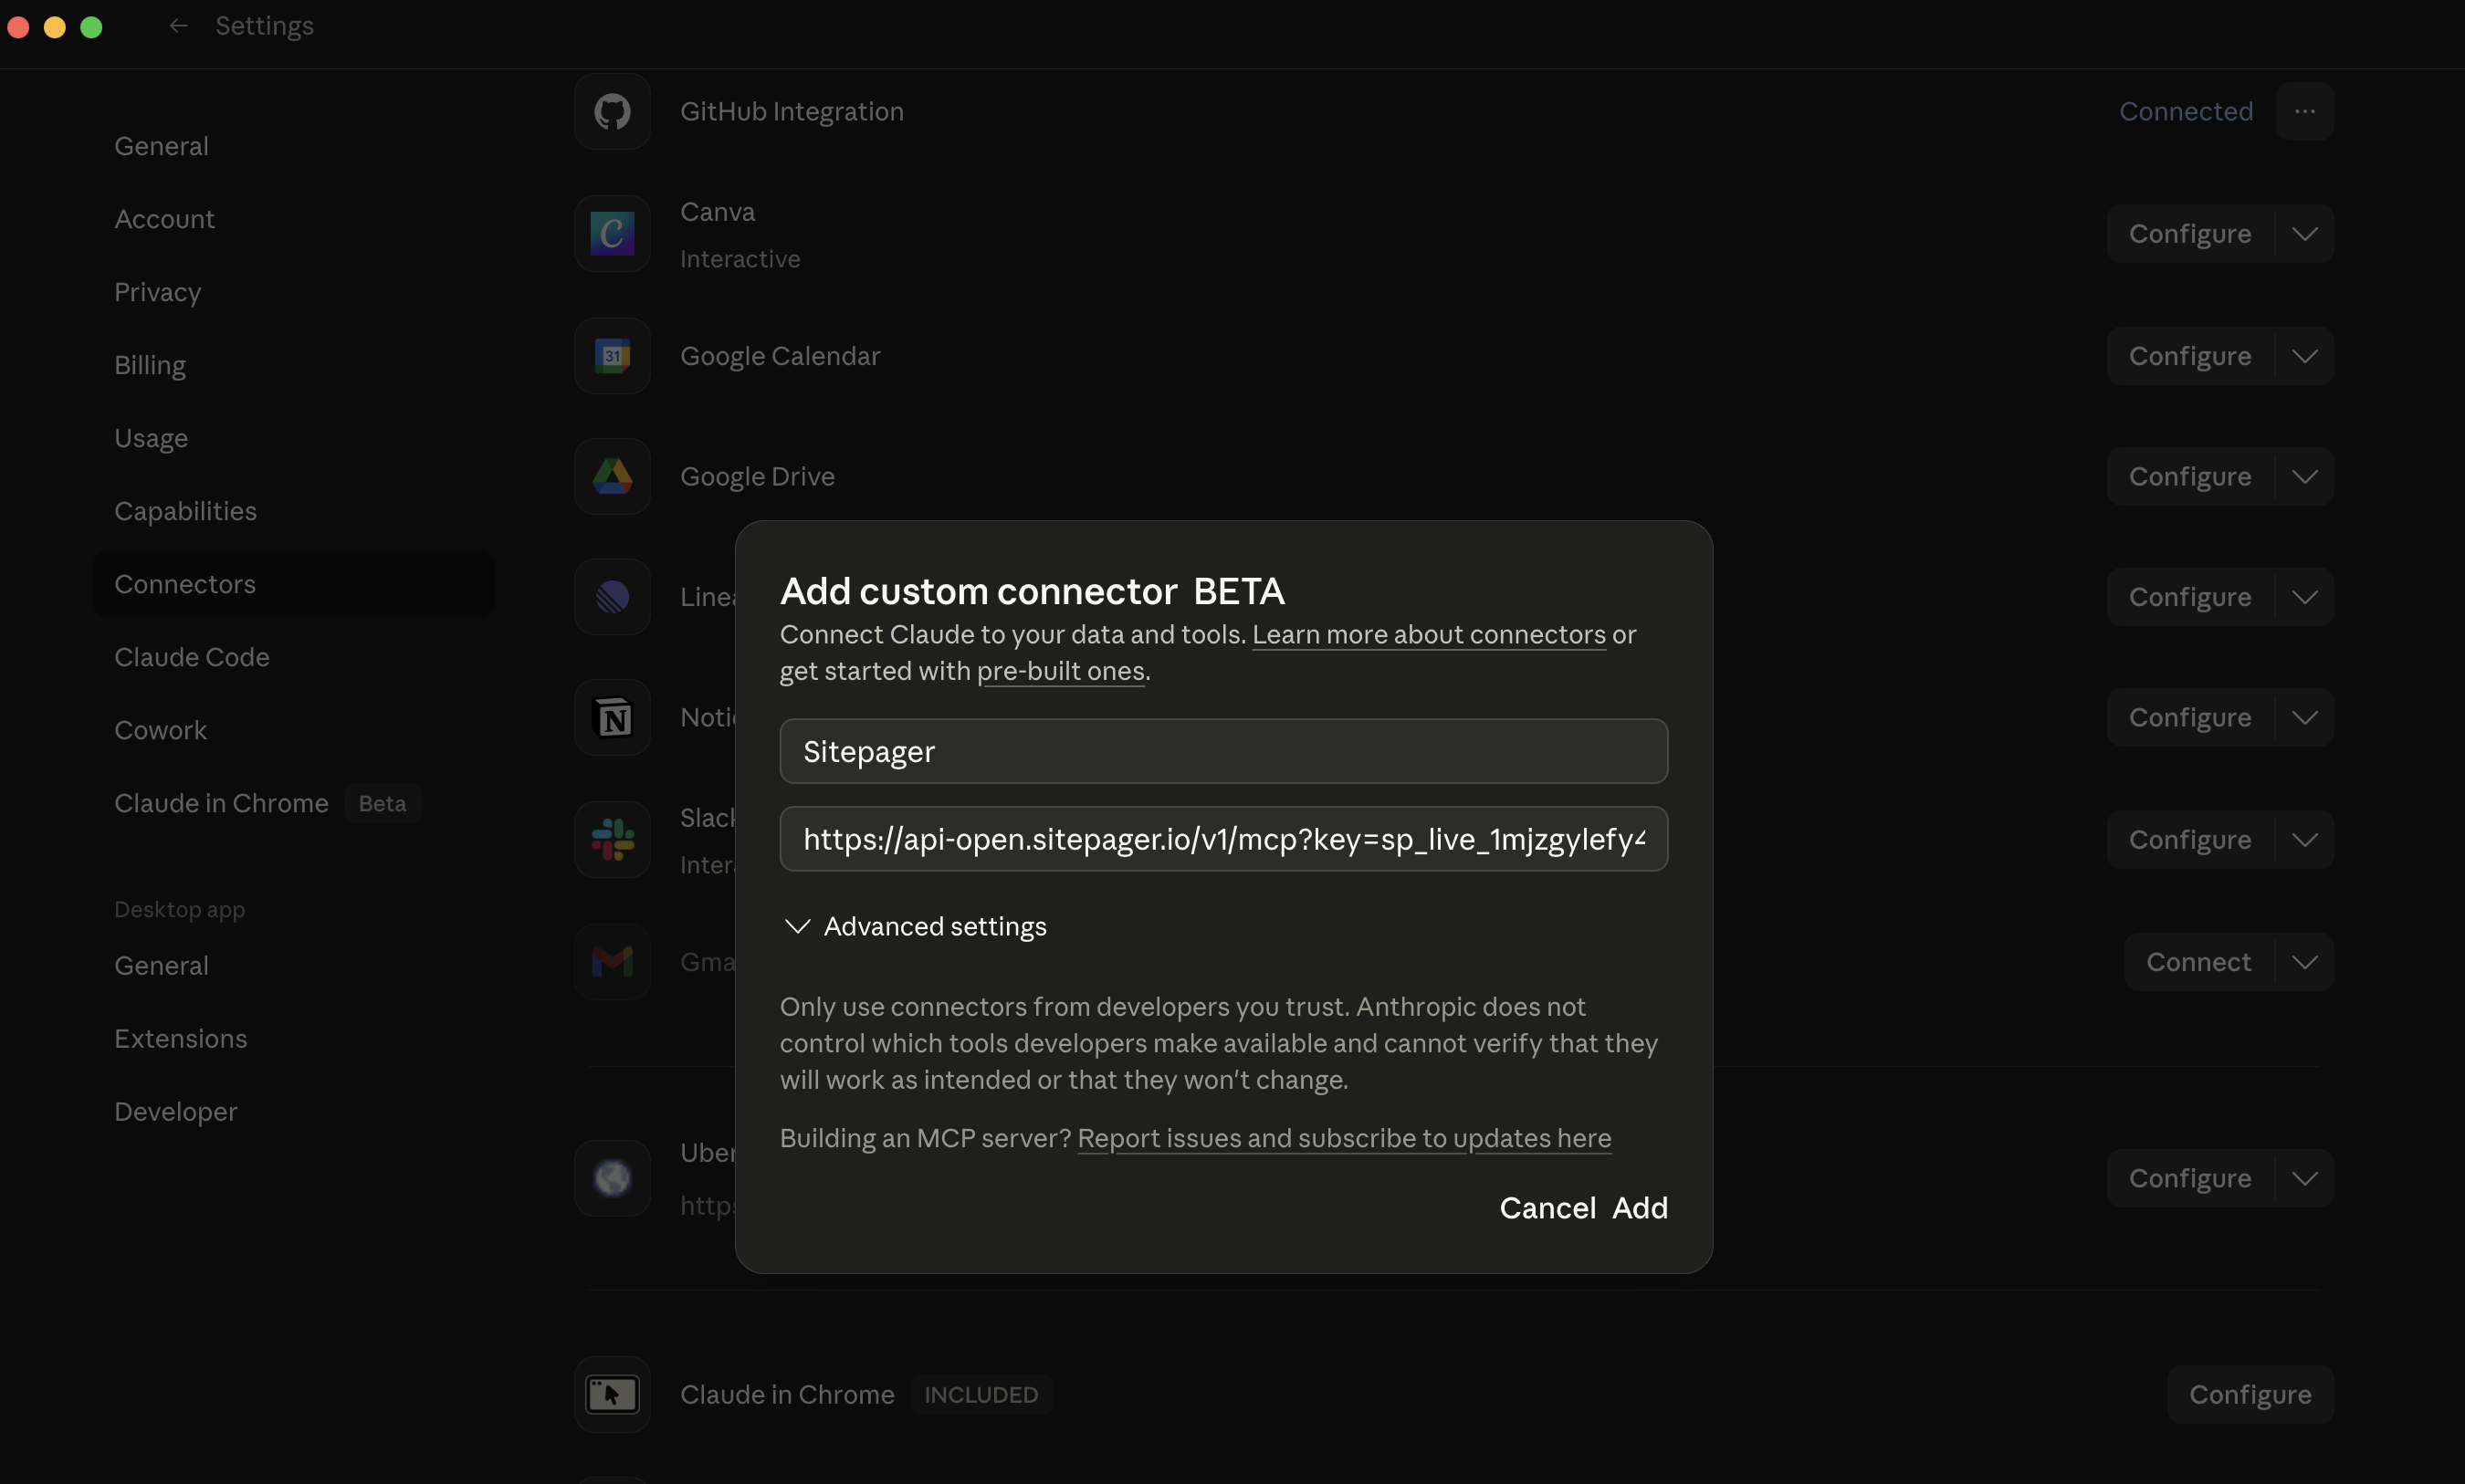
Replace YOUR_API_KEY with the key you copied from the previous step.
Treat this URL as sensitive because it includes your API key. If you rotate your key, update the URL here.
Claude Code connects to Sitepager using an Authorization header, so your API key is not included in the URL.
Recommended: Add Sitepager globally
Run this once from any terminal:
claude mcp add --transport http --scope user sitepager \ https://api-open.sitepager.io/v1/mcp \ --header "Authorization: Bearer YOUR_API_KEY"Replace YOUR_API_KEY with the key you copied from the previous step.
This makes Sitepager available in every Claude Code session, regardless of which project you are in.
Advanced: Add Sitepager to one project only
If you want Sitepager available only in a specific project, add a .mcp.json file to that project’s root:
{ "mcpServers": { "sitepager": { "type": "http", "url": "https://api-open.sitepager.io/v1/mcp", "headers": { "Authorization": "Bearer YOUR_API_KEY" } } }}Replace YOUR_API_KEY with the key you copied from the previous step.
Project-scoped setup is useful when you want separate keys for different workspaces, or when you want to share the setup with teammates.
If you commit .mcp.json, use an environment variable instead of an inline key:
"Authorization": "Bearer ${env:SITEPAGER_KEY}"Cursor and Windsurf both connect to Sitepager with a config file.
Use the config for your editor below.
Cursor
Add this to .cursor/mcp.json in your project root, or to ~/.cursor/mcp.json to make Sitepager available in all projects:
{ "mcpServers": { "sitepager": { "url": "https://api-open.sitepager.io/v1/mcp", "headers": { "Authorization": "Bearer YOUR_API_KEY" } } }}Windsurf
Add this to ~/.codeium/windsurf/mcp_config.json on macOS/Linux, or %USERPROFILE%\.codeium\windsurf\mcp_config.json on Windows.
Create the file if it does not exist.
{ "mcpServers": { "sitepager": { "serverUrl": "https://api-open.sitepager.io/v1/mcp", "headers": { "Authorization": "Bearer YOUR_API_KEY" } } }}Replace YOUR_API_KEY with the key you copied from the previous step.
Note: Windsurf uses serverUrl; Cursor uses url.
To avoid storing your key in the file, use an environment variable:
"Authorization": "Bearer ${env:SITEPAGER_KEY}"If your assistant supports remote MCP servers, use:
- Server URL:
https://api-open.sitepager.io/v1/mcp - Authorization header:
Bearer YOUR_API_KEY
Replace YOUR_API_KEY with the key you copied from the previous step.
If your assistant does not support remote MCP servers, see the Advanced: Local install tab.
Use this only if your assistant does not support remote MCP servers, or if you prefer running the @sitepager/mcp-server package on your machine.
Add the following MCP server config to your assistant:
{ "mcpServers": { "sitepager": { "command": "npx", "args": ["-y", "@sitepager/mcp-server"], "env": { "SITEPAGER_API_KEY": "YOUR_API_KEY" } } }}Replace YOUR_API_KEY with the key you copied from the previous step.
Verify the connection
Section titled “Verify the connection”Start a new session and ask:
Your assistant should return a list of your scans. If it does, the MCP connection is working.
Once connected, you can run scans, review issues, and verify changes directly from your assistant.
Example prompts
Section titled “Example prompts”What to do next
Section titled “What to do next”- Scan, Fix, Verify with AI — learn the universal fix workflow
- Fix Webflow Issues with AI — apply the workflow to a Webflow site